Confluence Webhook Setup Guide
Set up Confluence webhooks to keep your AI agents in sync with your documentation. You'll create three webhooks: one for page creation, one for updates, and one for deletion.
What are Webhooks?
Webhooks are automated messages sent from one application to another when specific events occur. Think of them as "push notifications" for applications - instead of constantly checking for updates, your application gets notified immediately when something changes.
In our case, Confluence webhooks will automatically notify Tridan AI whenever you create, update, or delete pages, ensuring your AI agents always have the most current knowledge from your documentation.
How Confluence-Tridan AI Integration Works
1. User Updates Confluence Page
You create, update, or delete a page in your Confluence workspace
2. Webhook Triggered
Confluence automatically sends page data to Tridan AI's endpoint
→ https://nirmata-core.tridan-ai.com/connectors/confluence/webhook3. Vector Database Updated
Tridan AI processes and stores the updated content in its knowledge base
4. AI Agent Has Current Knowledge
Your AI agents immediately access the updated information for accurate responses
Benefits of Real-Time Sync
- • Instant Updates: No manual syncing required
- • Always Current: AI agents work with the latest documentation
- • Automatic: Set up once, works continuously
- • Comprehensive: Handles page creation, updates, and deletion
Webhook URL
URL to use for all webhooks:
https://nirmata-core.tridan-ai.com/connectors/confluence/webhookThis URL should be entered in the "This action will send a HTTP request to the url specified" field when setting up webhooks in Confluence.
Step-by-Step Setup
1Setting Up Credentials
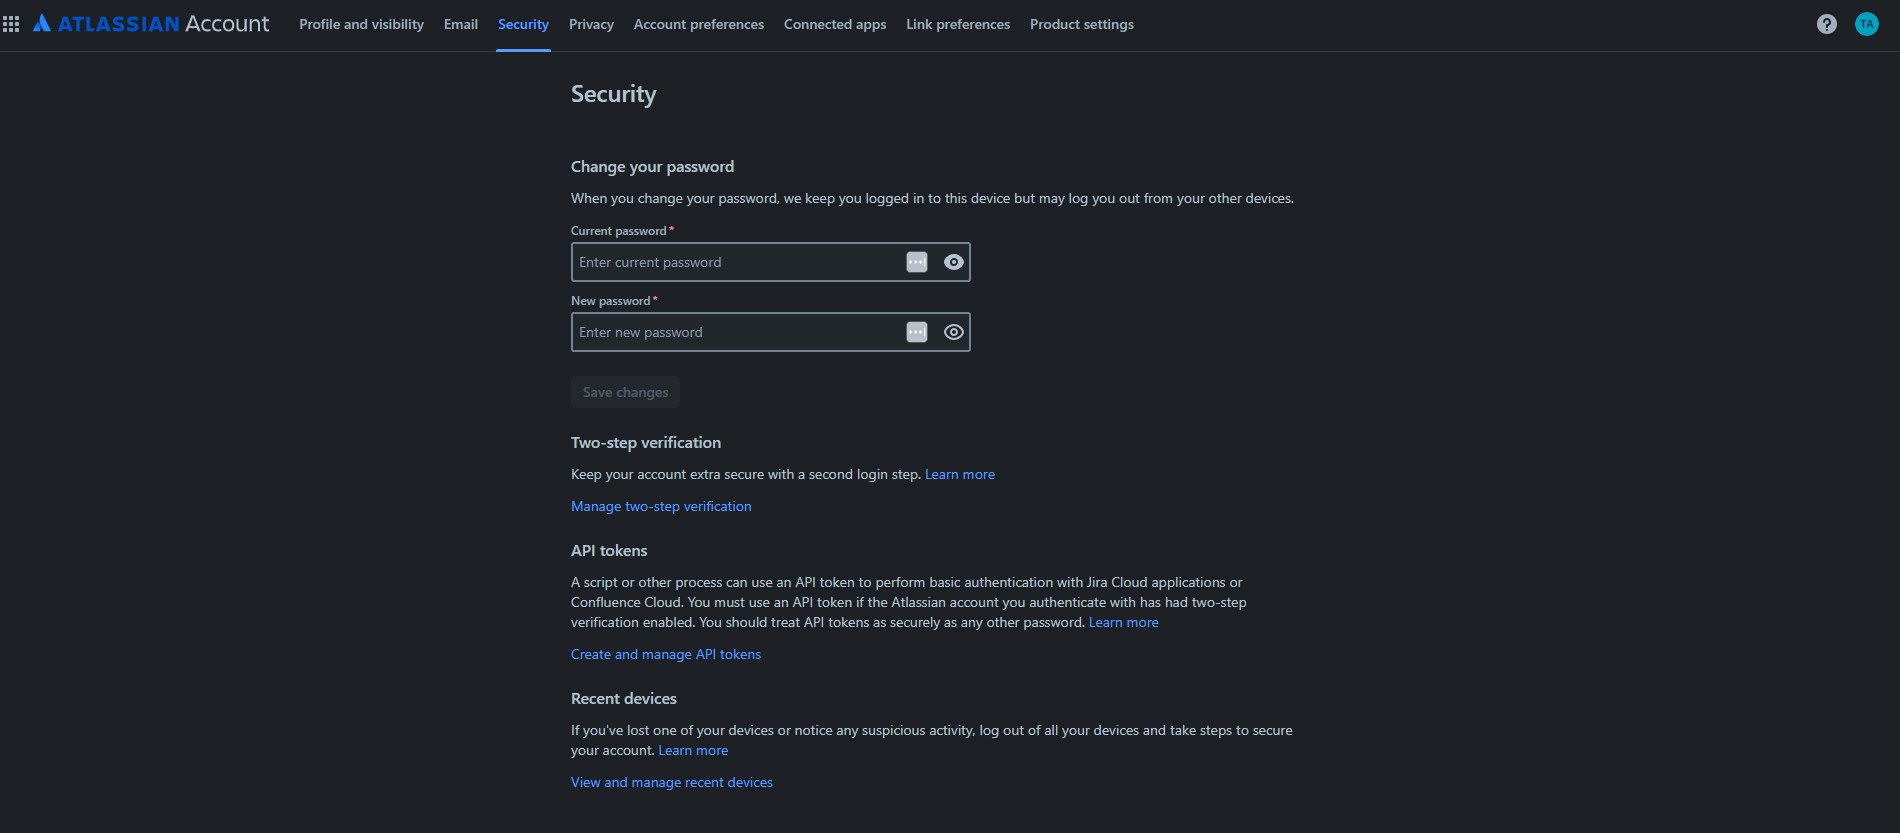
Start by navigating to your Confluence settings and set up the necessary credentials for webhook authentication.
2Confluence Configuration
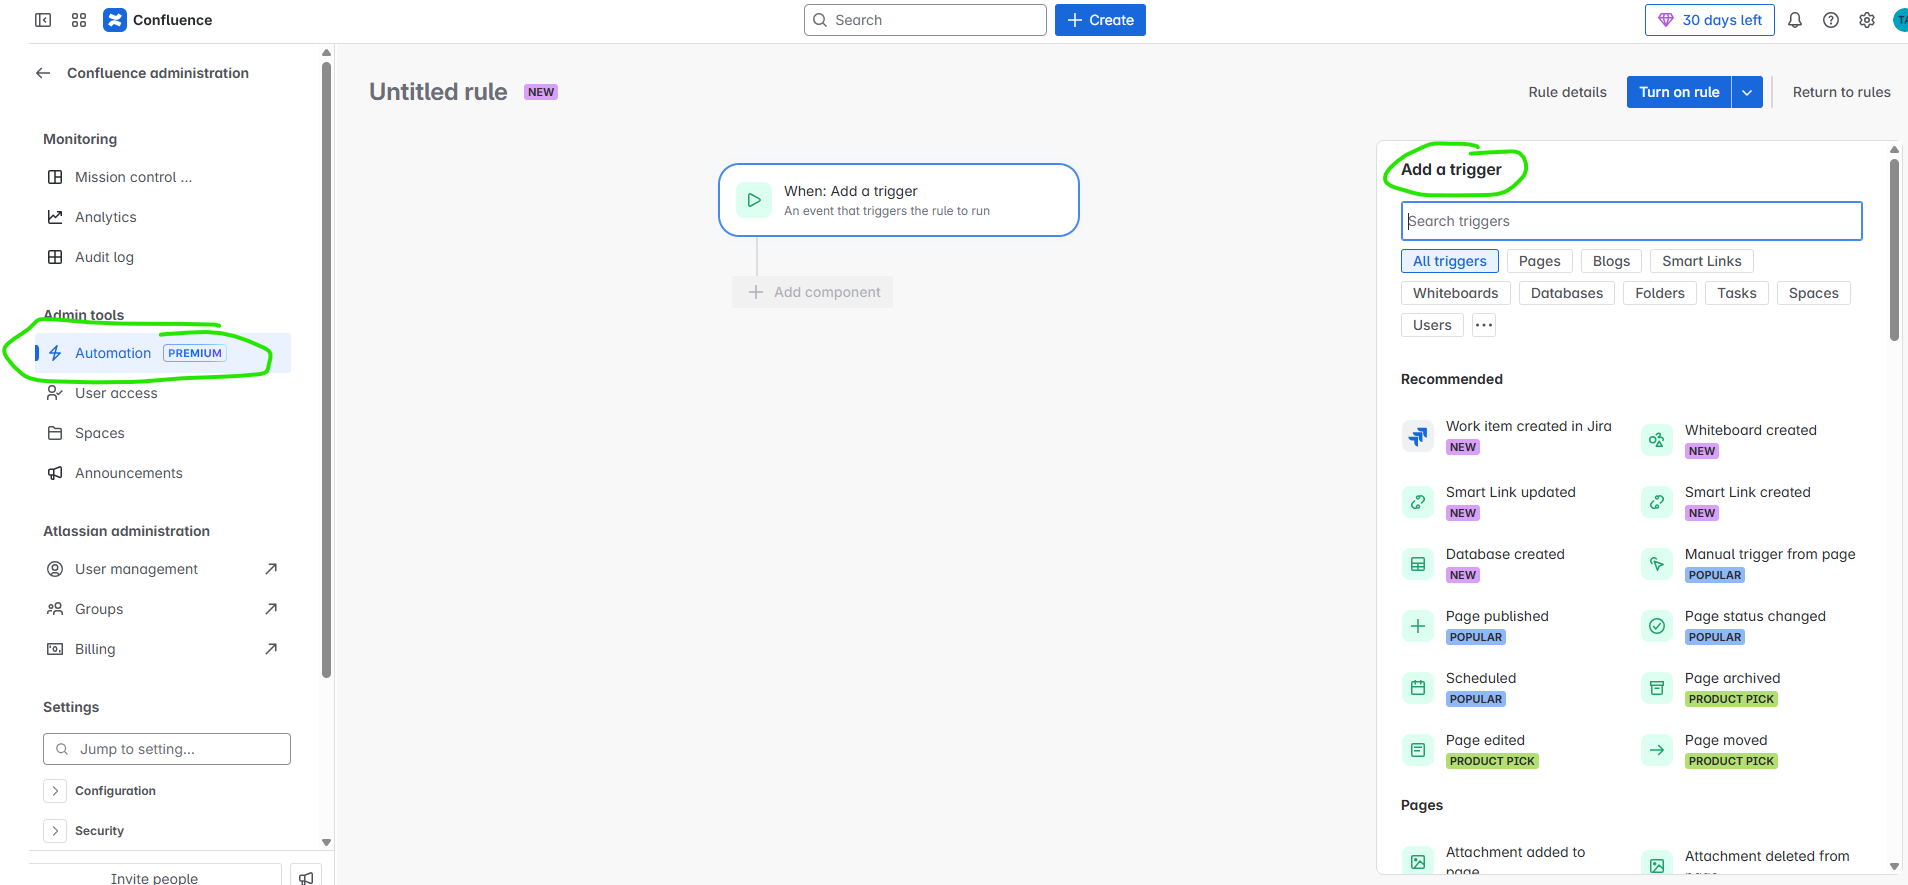
Access the Confluence automation settings where you'll create your webhooks.
3Setting Up Hooks
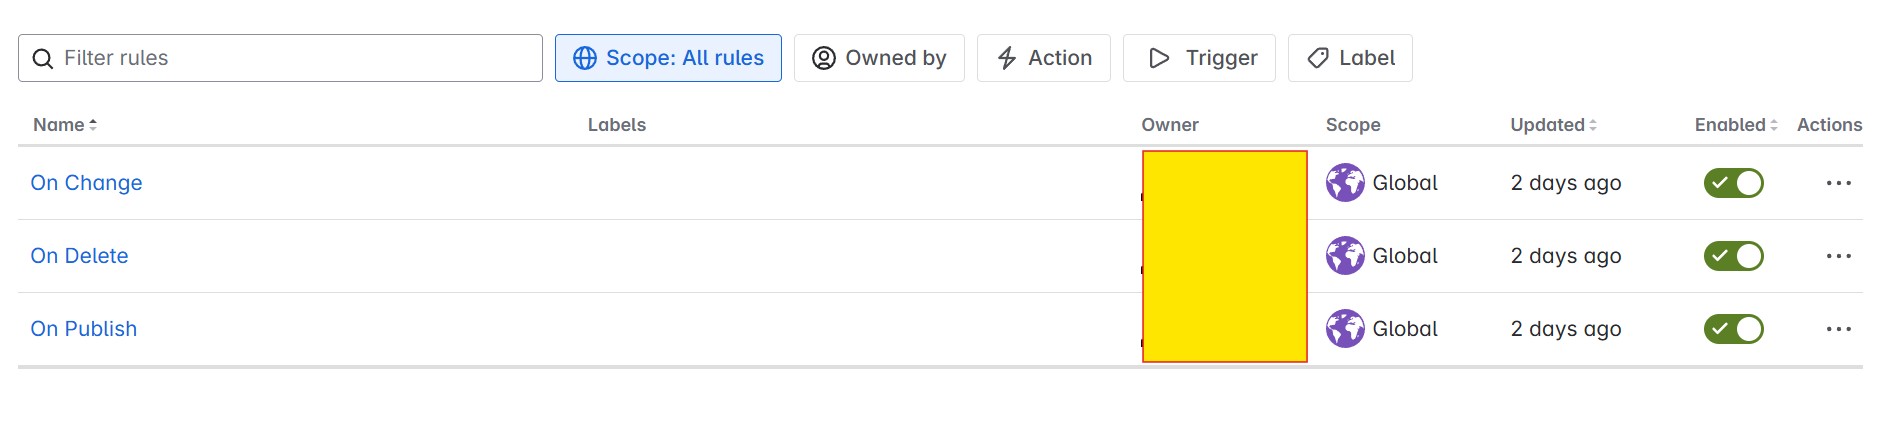
Configure the webhook triggers for page events (create, update, delete).
4Define Hooks
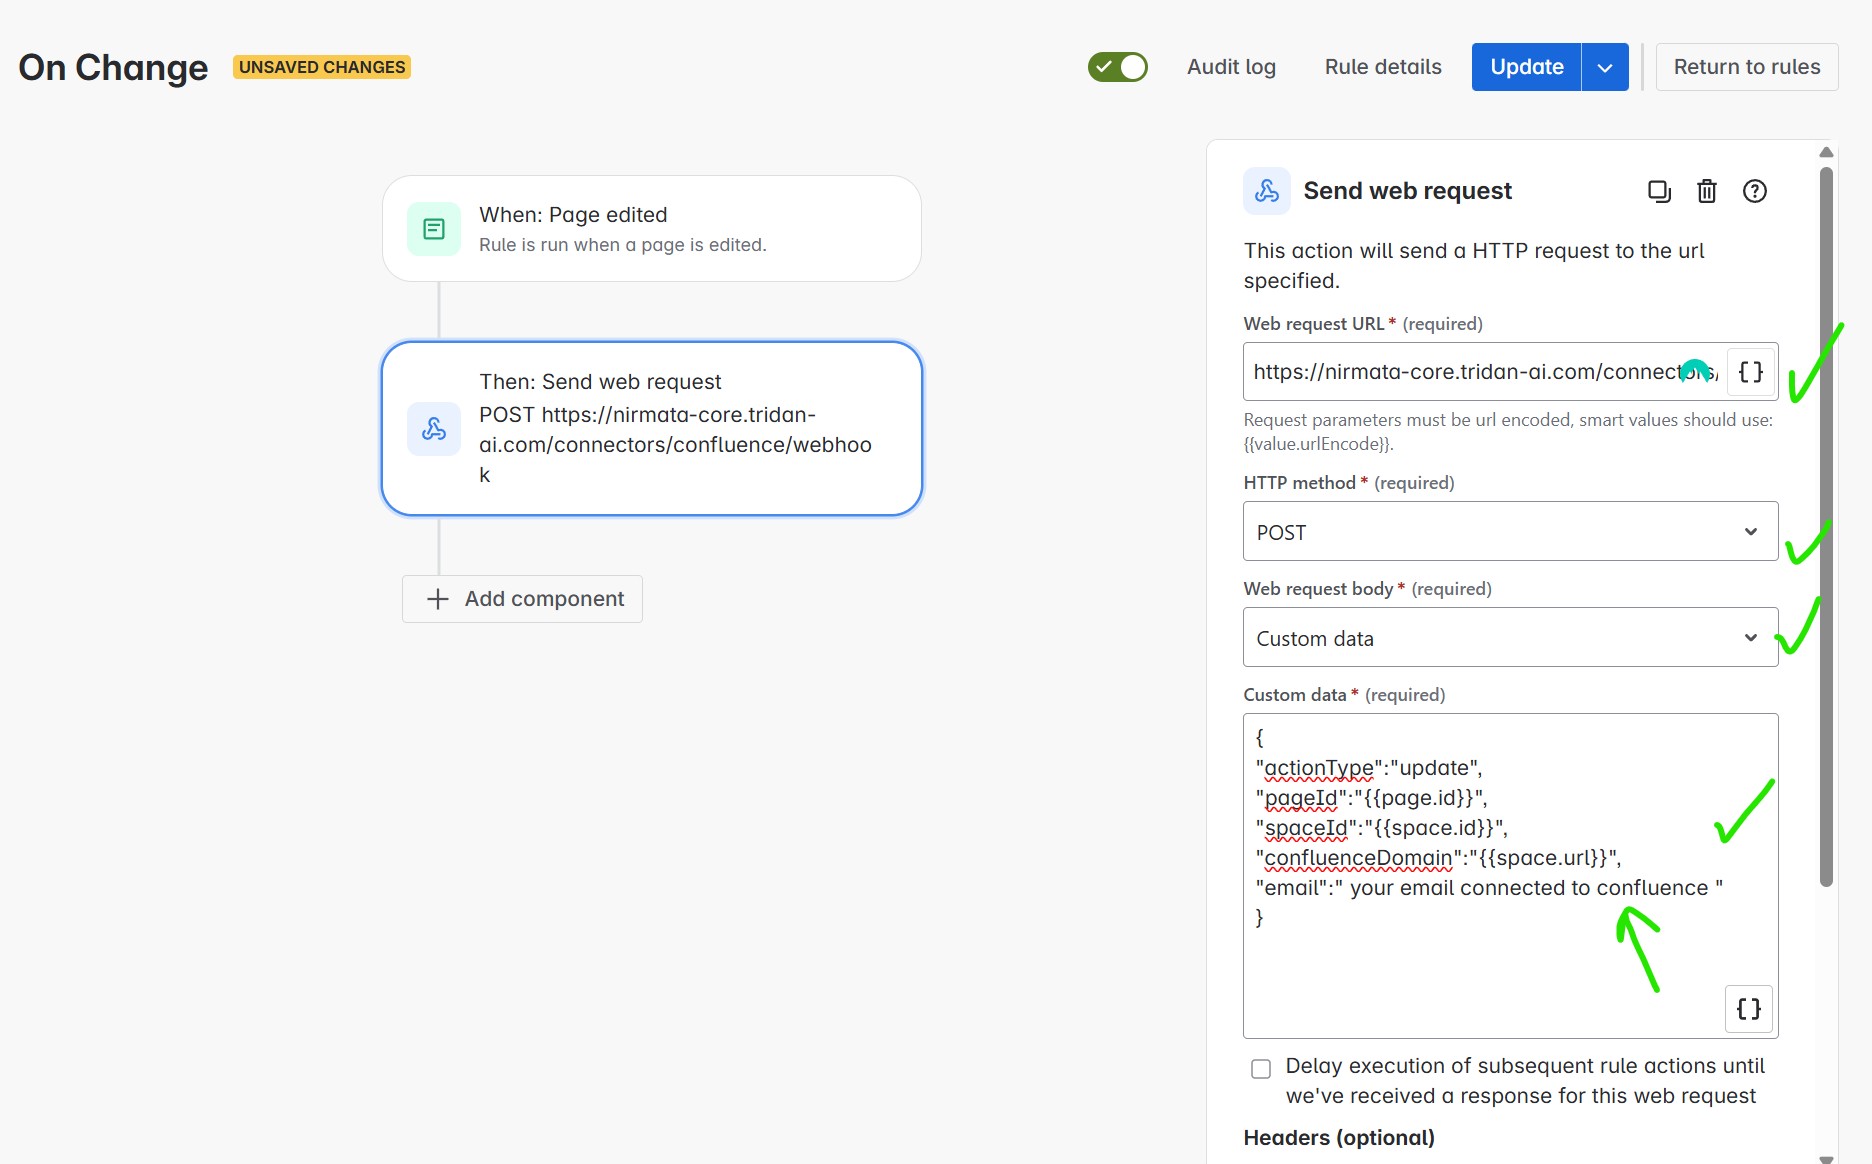
Define the specific webhook configurations using the payloads and URL provided below.
Webhook Payloads
Create three separate webhooks using these custom data payloads. Make sure to replace "your email connected to confluence" with your actual Confluence email address.
1. Page Creation Webhook
{
  "actionType": "create",
  "pageId": "{{page.id}}",
  "spaceId": "{{space.id}}",
  "confluenceDomain": "{{space.url}}",
  "email": "your email connected to confluence"
}
Use this payload for page creation webhook events.
2. Page Update Webhook
{
  "actionType": "update",
  "pageId": "{{page.id}}",
  "spaceId": "{{space.id}}",
  "confluenceDomain": "{{space.url}}",
  "email": "your email connected to confluence"
}
Use this payload for page updates webhook events.
3. Page Deletion Webhook
{
  "actionType": "delete",
  "pageId": "{{page.id}}",
  "spaceId": "{{space.id}}",
  "confluenceDomain": "{{space.url}}",
  "email": "your email connected to confluence"
}
Use this payload for page deletion webhook events.
Important Notes
Email Configuration: Replace "your email connected to confluence" with the actual email address you use for Confluence.
Webhook URL: Use the same URL (https://nirmata-core.tridan-ai.com/connectors/confluence/webhook) for all three webhooks.
Testing: After setup, test each webhook by creating, updating, and deleting a test page to ensure proper synchronization.
Need Help?
Our engineering team is here to help you set up Confluence webhooks for seamless integration.
Last updated · Reviewed by Nemanja Milivojevic, Founder